Hi Friends,
since i started posting pics of my current KDM commission, lot of people asked about the way i painted the creepy face-bases.
For those not familiar with the game, they are round bases portraying the “plain of faces” where the game’s prologue takes place, a desolated land where the floor is made of stone faces: the first survivors wake up here, helpless and clueless.
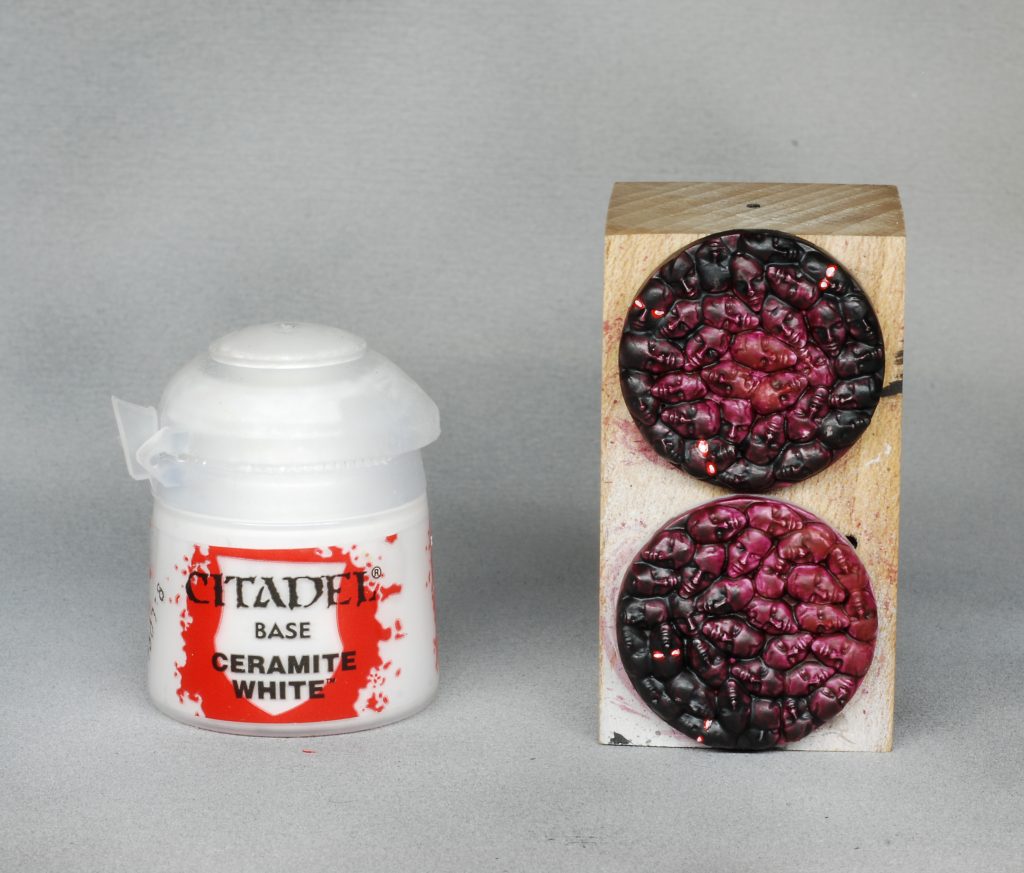
Here’s a couple images to show them.
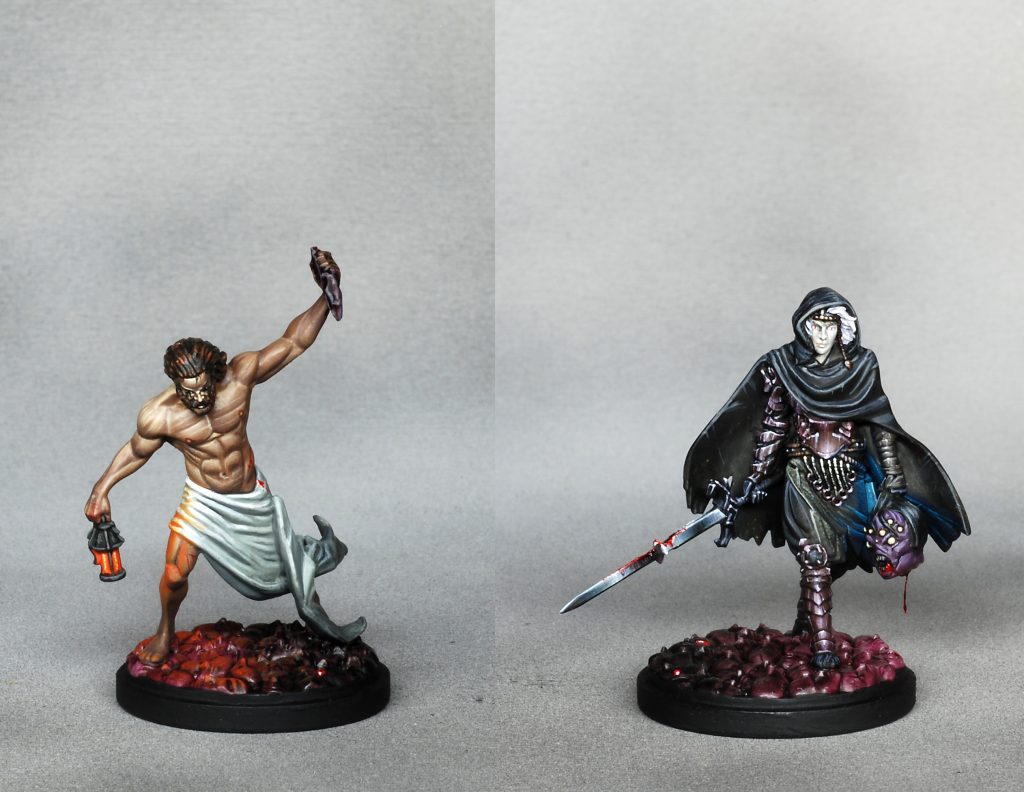
When discussing the color scheme for this commission, the customer was kind enough to give me full creative freedom provided that i would paint the set in a dark and nightmarish theme.
There are artworks in the rulebook that for sure played a role in inspiring me (the illustration about the brain traumas is creepy as hell), and indeed another influence comes from Berserk, in particular the Eclipse.
So, i imagined the survivors walking in a plain of crimson faces, maybe stone-made, maybe alive and watching them!
I decided to paint the bases with this unsettling crimson color, leaving black in the zone of shadows and adding some glowing eyes here and there, to simulate a gloomy presence around the survivors.
I posted this tutorial on my other socials also, have a look if you’re there, but obviously here on my blog i can describe it more exhaustively:
So, here’s how it’s done.
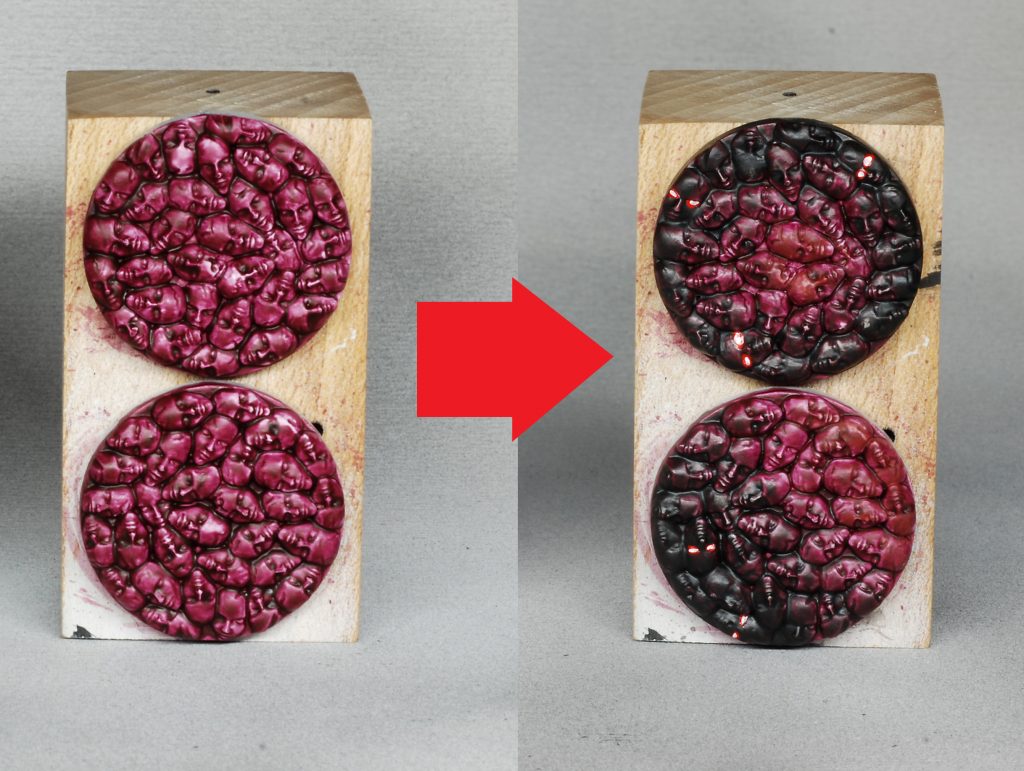
STEP 1:
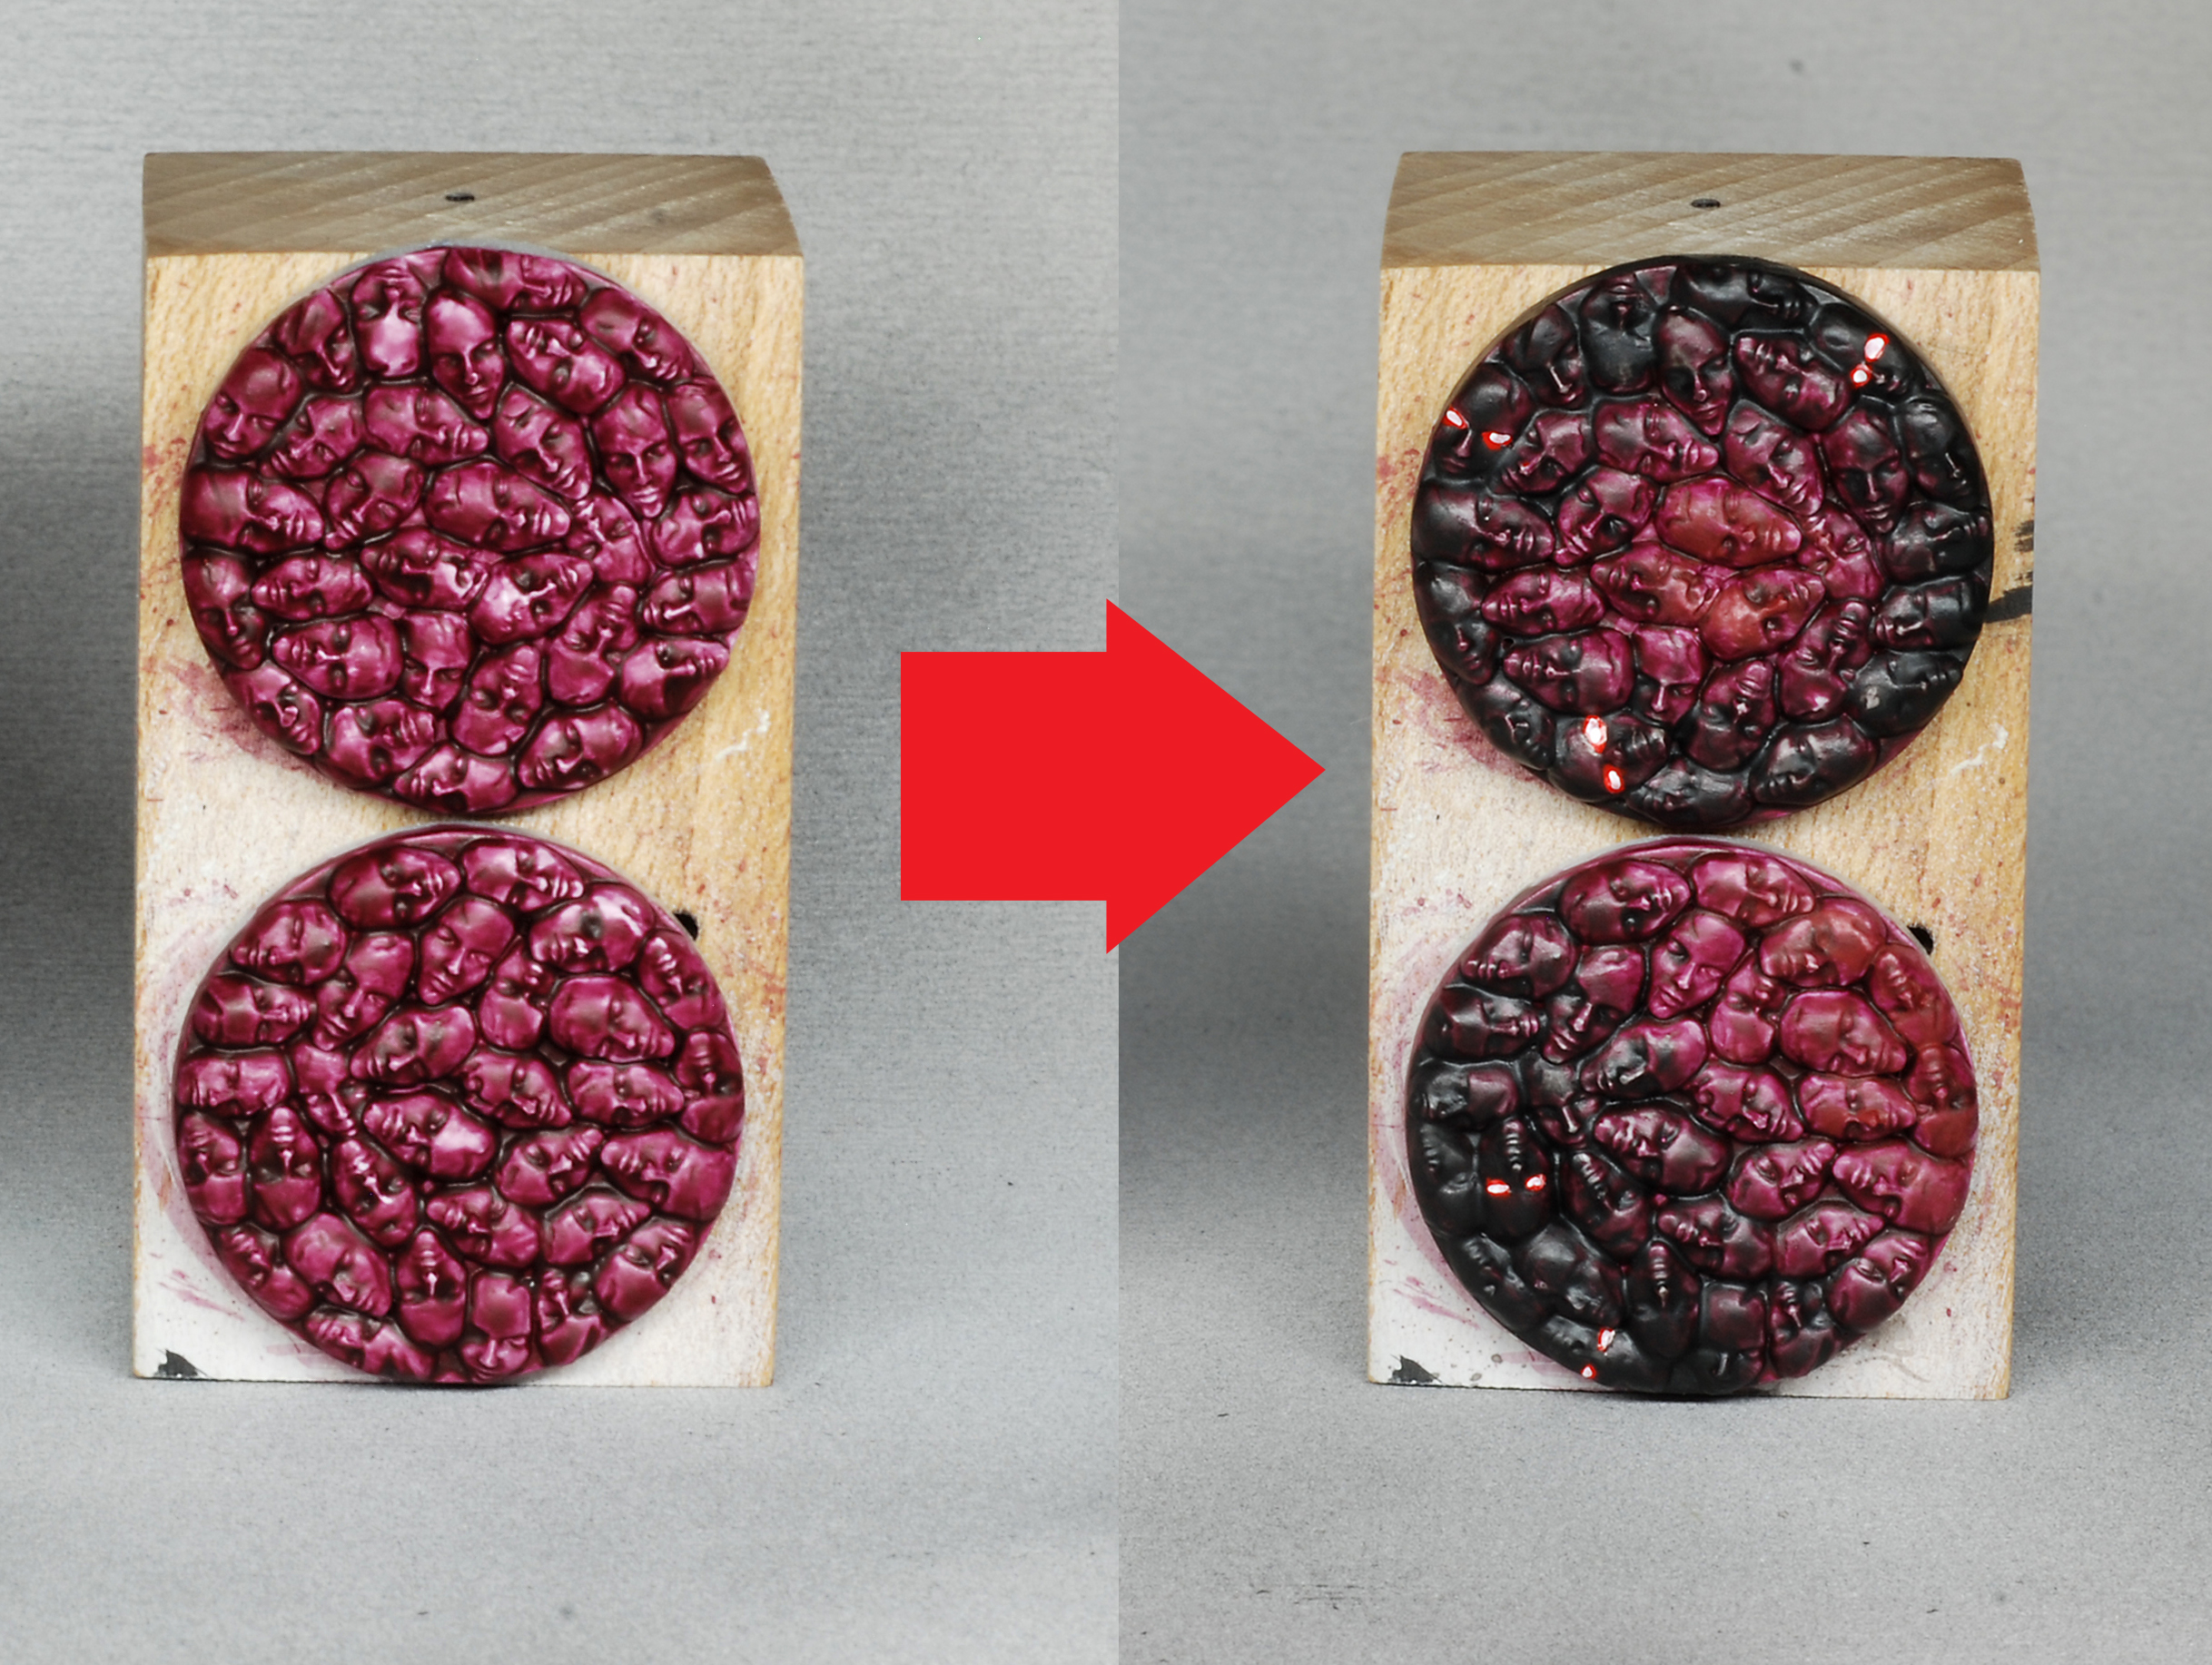
over a white primer, wash 2-3 times with Carroburg Crimson until you have a good coverage.
Be sure to let every layer to completely dry.
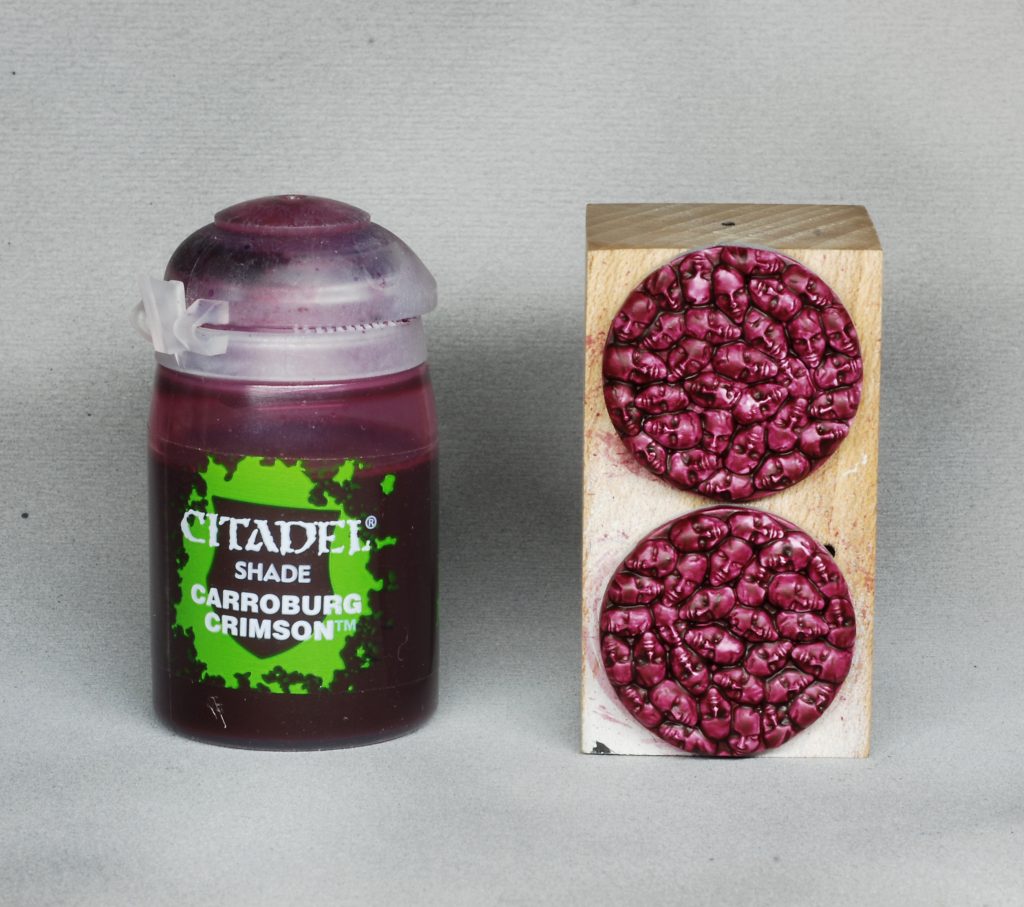
STEP 2:
wash 2-3 times with Nuln Oil to create a gradient for the shadow.
I usually put the shadow opposite to where the model is facing or looking, to create a sense of lumbering darkness behind him.
On the upper base, you can see i concentrated the shadow all around the model (that will be positioned in the center).
Both ways, you’ll obtain a sense of gloomy isolation.
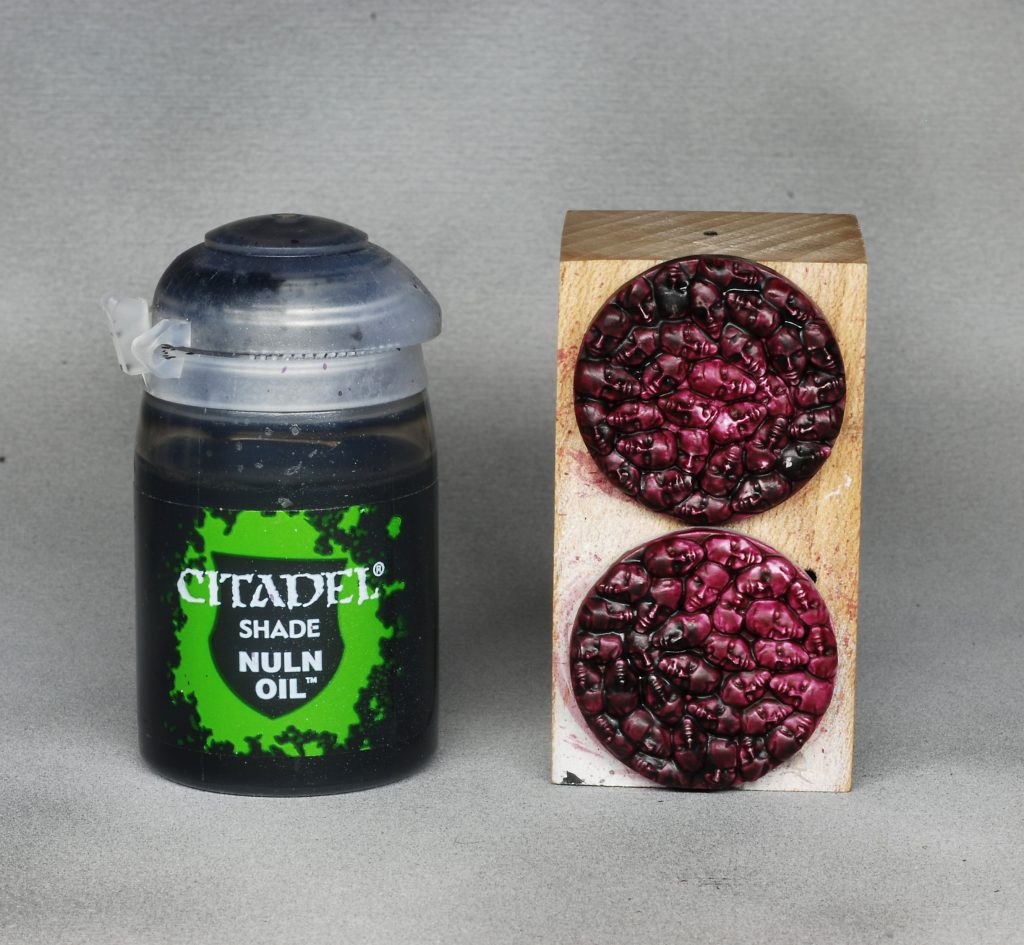
STEP 3:
use pure black to strenghten the zones of maximal shadow.
Best way is to use a damp brush or, better yet, to paint the black while the wash is still wet.
You should aim for a good blending.
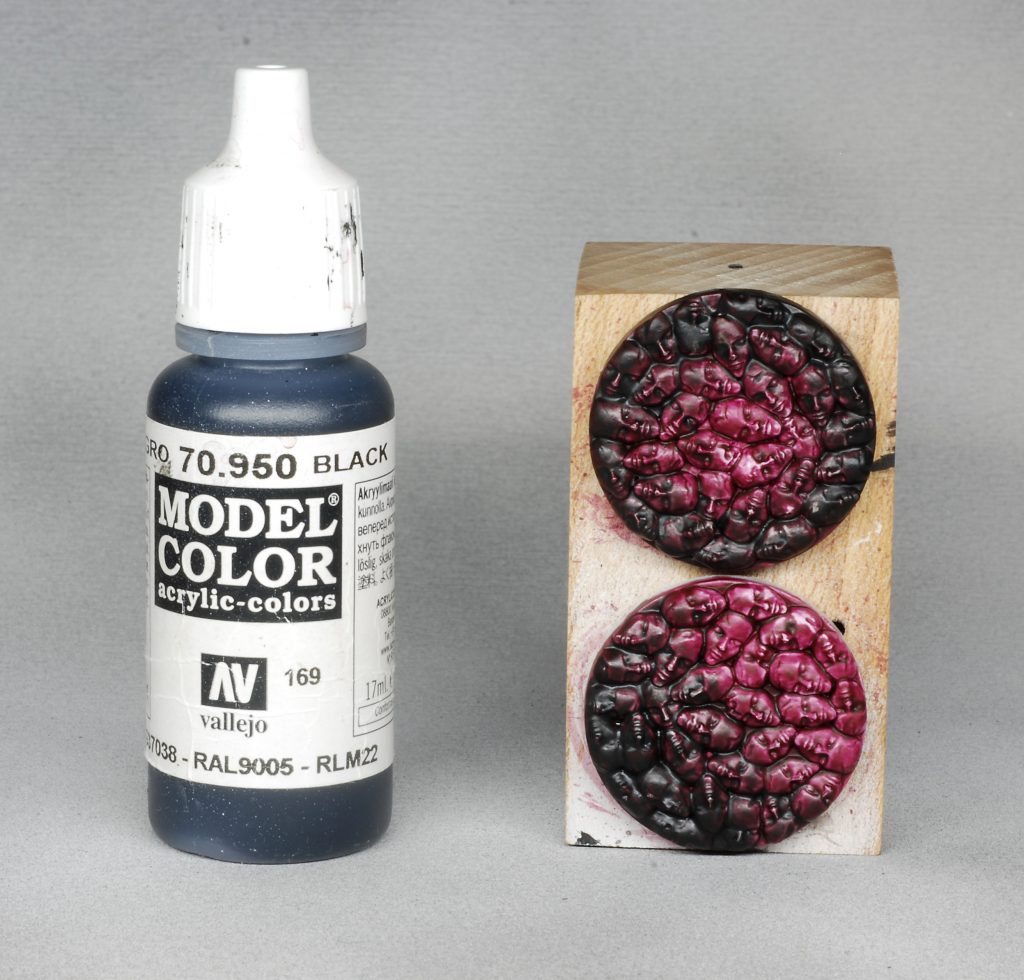
STEP 4:
Optional: use a red similar to Carroburg Crimson ( Vallejo Red isn’t a good match….) to add some color in the zone of max light, or to cover parts of the base where the crimson rubbed off.
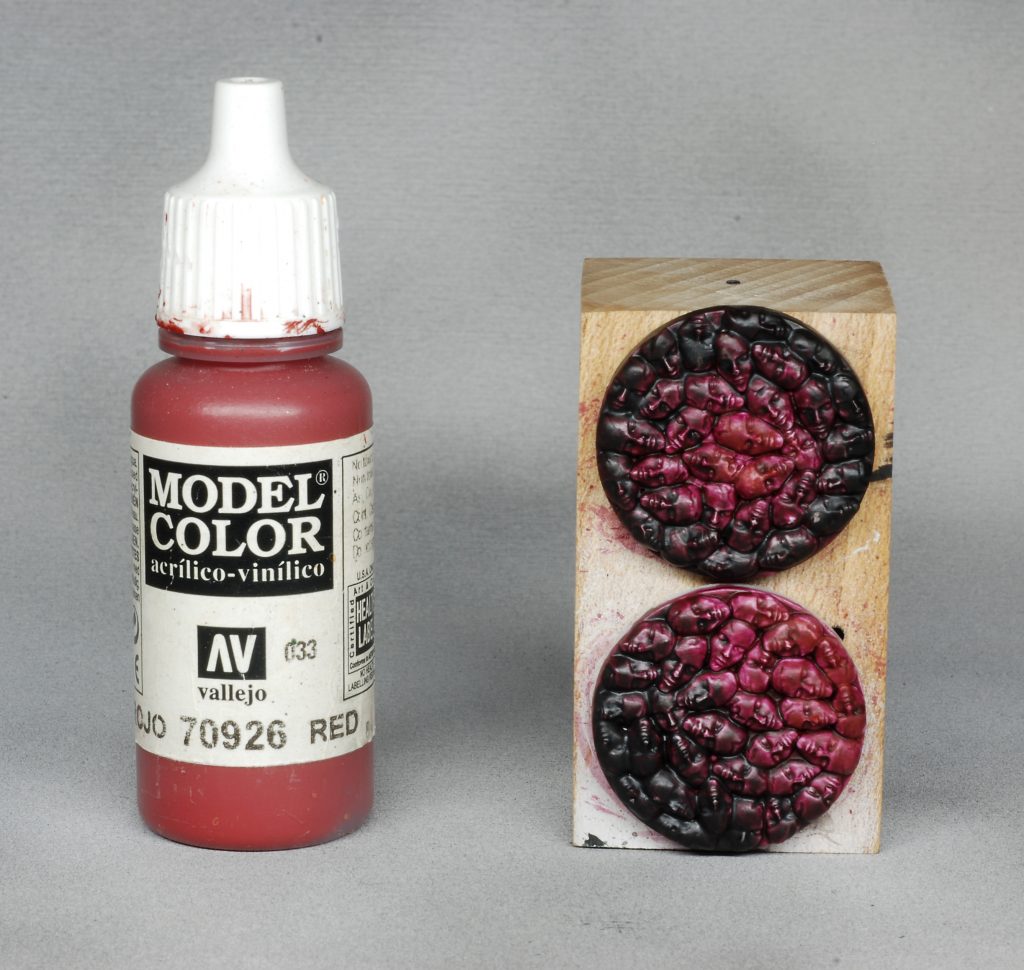
STEP 5:
use pure white to paint the eyesockets of some faces, they have closed eyelids but we will paint them as they were open.
I choose to paint the white in the zone of max shadow, so to boost the contrast and to give the idea of eyes glaring the poor survivors from the dark.
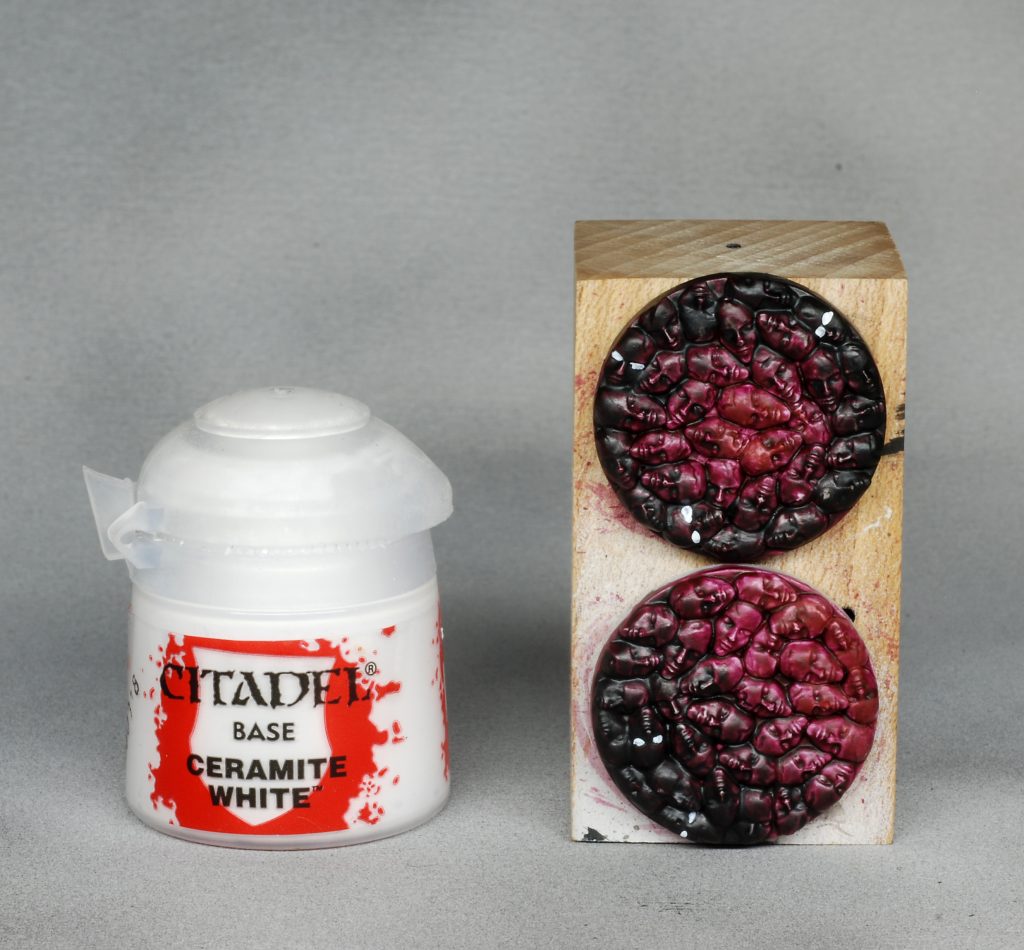
STEP 6:
use a bright, saturated red to paint over the white.
If we’ve had painted the red directly over black, the result would’ve been a lifeless, desaturated color.
Side note: in the pic you can see i’ve used red from Vallejo Mecha Color; it’s a very liquid, high pigmented and gloss red that i’ve found perfect for simulating dripping blood from the survivor’s wounds.
It’s the first color i tried from this line, and in the future i will surely experiment with others (maybe gloss blue for alien blood and ichores 😀 ).
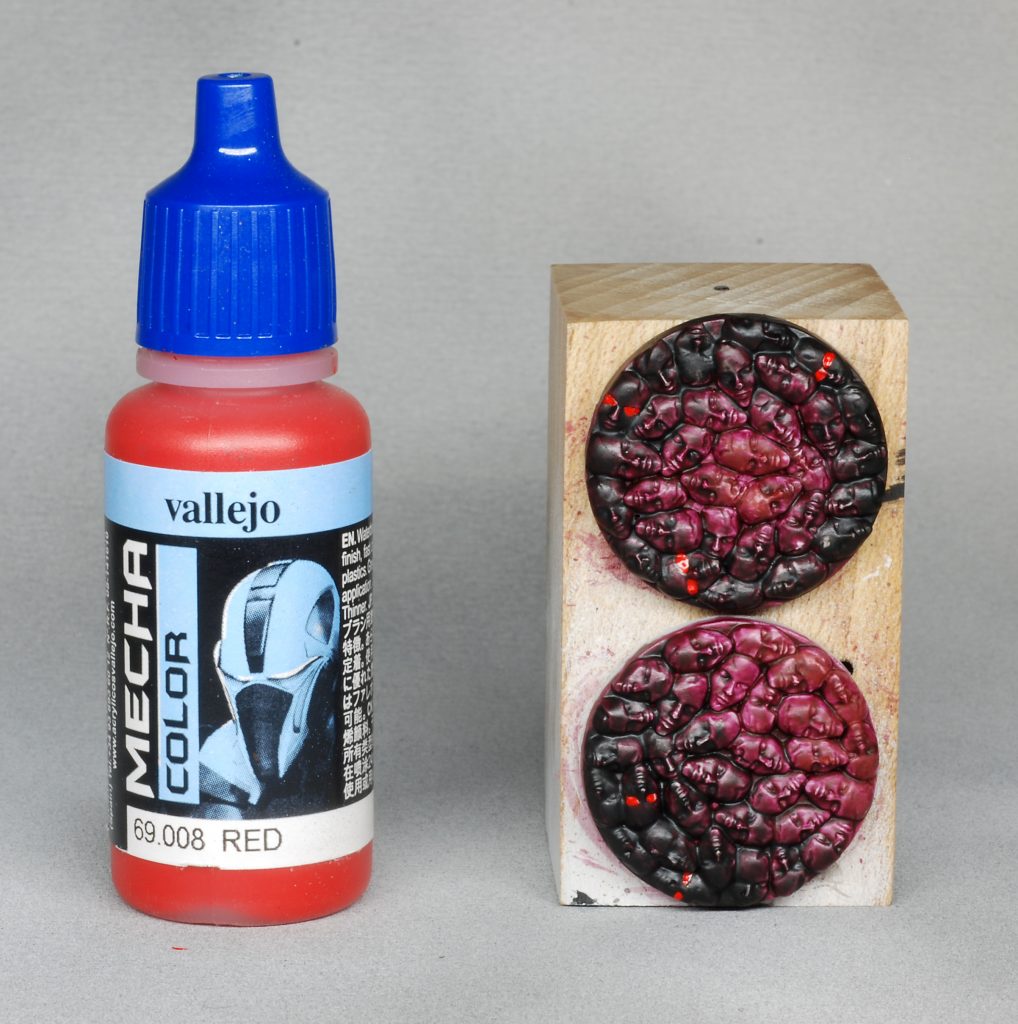
STEP 7:
paint the eyeballs white, leaving red all around it. No need to be super-precise, but be sure to leave the red visible to give the glowing effect.
As simple as that !
Time permitting, in the future i will write more tutorials like this one.
If you liked this one, let me know in the comments!
Until next time,
Lorenzo

Damn!! Tutorials on these two miniatures would be awesome!
With time, hopefully i will be able to create tutorials on painting miniatures SBS. 🙂
Just wanted to tell you … your work is stunning. I could never afford to pay you to do something like this for me, but it’s just absolutely beautiful work and I had to say something.
Thank you Michael for taking the time for such kind words.
And feel free to inquire anytime if you want something painted, i’m not that expensive. 🙂